
Saturday, November 16, 2013

 PDF
PDFSunday, November 10, 2013
Tamarind Water
Have you ever had tamarind sauce with your Indian or Asian food?

You can buy the tamarind as I have, in pod form, already in pulp form or in a jar. I prefer to make my own so that I know what it contains and it is fairly easy to do. The photo is what the tamarind looks like in each stage of getting it ready to use – I like instructions with pictures too.
The pods are dried and the outer shell comes off easily. Just crack (like a peanut) and discard the outer shell. Next, you will have a sticky solid pod with large fibers. Peel off the fibers and toss them too. Put your cleaned pulp (which still has the seeds inside) into a saucepan, add 2 cups water. Bring to a simmer, turn off the heat and let the pulp soften for about 30 minutes.
If you have a food mill – go drag it out; if not, then get a sieve to use. Over a large bowl, place either the food mill or sieve, then pour in the tamarind and it's water. Push all the pulp through the sieve. You will have nothing remaining in the sieve except hard seeds and a few pesky fibers that escaped you before. Toss those – they are no good to anyone.
To your warm liquid, add ½ cup sugar. Stir until the sugar is dissolved. Add enough water to make 2 quarts. Give it a taste.......yummy, does it need more sugar? More water? Add them now if you do.
Serve this refreshing sweet-tart drink over ice. Use this as an alternative to iced tea or soda.
Thursday, October 31, 2013
Pan de Muertos (Bread of the Dead)
 Since moving to Mexico I have begun to
enjoy all the traditional holidays and the traditions that go along
with them. Day of the Dead (Dia de los Muertos) is a very festive
but also somber holiday honoring the family and friends that have
died. Cemeteries are packed on both November 1st and the 2nd with
families offering flowers and having picnics at the graves of their
dearly departed, sharing their favorite memories. Altars are
constructed in homes, places of business, roadside shrines, and of
course cemeteries. These altars will have photos of the departed,
and offer to them their favorite pleasures from this life, such as
cigarettes, tequila, certain favorite foods and any other 'earthly'
item that person was fond of. In many cases the altar will remain
for at least a week after the celebration.
Since moving to Mexico I have begun to
enjoy all the traditional holidays and the traditions that go along
with them. Day of the Dead (Dia de los Muertos) is a very festive
but also somber holiday honoring the family and friends that have
died. Cemeteries are packed on both November 1st and the 2nd with
families offering flowers and having picnics at the graves of their
dearly departed, sharing their favorite memories. Altars are
constructed in homes, places of business, roadside shrines, and of
course cemeteries. These altars will have photos of the departed,
and offer to them their favorite pleasures from this life, such as
cigarettes, tequila, certain favorite foods and any other 'earthly'
item that person was fond of. In many cases the altar will remain
for at least a week after the celebration.
Traditional foods apply to this holiday
as they do any other Mexican holiday. One of my favorites, is Bread
of the Dead (Pan de Muertos). During the week prior to Day of the
Dead, you can even order it in restaurants. Here is a simple recipe
for your own pan. (pan means bread) The bread is for
the living but can also be placed on the altar.
The decoration on top of the bread is
to symbolize bones.
 Pan de
Muertos (Bread of the Dead)
Pan de
Muertos (Bread of the Dead)
Heat the milk and the butter together
in a small saucepan, until the butter melts. Remove from the heat and
add the warm water. Allow the mixture to cool to 45° C / 110° F.
In a large bowl combine 1 cup of the
flour, yeast, salt, anise seed and 1/4 cup sugar. Beat in the warm
milk mixture, until well combined. Add in the eggs and orange zest,
beating until well combined. Stir in 1/2 cup flour and continue
adding more flour until you have a soft dough.
Turn the dough out onto a lightly
floured surface and knead until smooth and elastic. (about 5
minutes)
Place the dough into a lightly greased
bowl; cover with plastic wrap and let rise in a warm place until
doubled in size. This will take about 1 to 2 hours. Punch the dough
down. Remove small pieces of dough and roll into long 'cigar'
shapes. Form the remaining dough into a large round loaf or 4 smaller
rounds. Arrange the 'cigar' shapes in an X pattern on top of the
loaf. Place dough onto a baking sheet, loosely cover with plastic
wrap and let rise in a warm place for about 1 hour or until just
about doubled in size.
Bake in a preheated 175°
C / 350° F oven for
about 35 to 45 minutes. Remove from oven, let cool slightly then
brush with glaze.
To make glaze: In a small saucepan
combine 2 tablespoons sugar and orange juice. Heat until sugar is
melted. Brush over top of the bread while still warm, then
immediately sprinkle with the remaining sugar.
Wednesday, October 16, 2013
Carrot Cake from Mexico
Living (and eating) in Mexico has opened my eyes (and mouth) to other types of cakes and desserts. I, for some reason, always thought cakes and desserts had to be chocolate … do you have a problem with that? Most Mexican cooks I know don't use chocolate for desserts because it is just too expensive. I have been introduced to wonderfully fresh tasting carrot cakes. There are probably as many recipes for carrot cake as there are cooks, so I picked one I really liked and my friend, Leti told me I could share it with you.
If you have the option of purchasing fresh pineapple, then please do. Canned pineapple is an ok substitute, but freshness is what home cooking is all about. Besides, a can of pineapple actually costs more than an entire fresh pineapple – see where this is going?
Also, a note on coconut. You are permitted to use dried coconut in place of fresh BUT use unsweetened only. Do not buy that bag of sugary coconut on the baking aisle and expect it to give you a delicious flavor in your cake. If you cannot buy unsweetened, then leave it out.
On to the recipe:
2 cups granulated sugar
1¼ cups vegetable oil
3 large eggs, at room temperature
1 teaspoon pure vanilla extract
2 cups all purpose flour
2 teaspoons ground cinnamon
1½ teaspoons baking powder
1 teaspoon baking soda
½ teaspoon salt
2 cups (packed tightly) grated carrots (about 1 lb / 454 grams)
1 cup shredded coconut, dried or fresh, unsweetened
1 cup chopped pecans or walnuts
1 cup diced fresh pineapple, make sure to catch the juice to include
Preheat the oven to 175°C (350°F). Lightly grease 2 8-inch round cake pans or one 9x13 inch.
Beat the sugar, oil, eggs and vanilla until light yellow in color.
In another bowl, sift together the dry ingredients. Add this to the sugar mixture. Mix in the remaining ingredients and stir until completely combined.
Pour the batter into your prepared pan(s). Bake for 35-40 minutes or until a toothpick comes out clean. Let the cakes cool completely in the pan(s) on a wire rack.
FROSTING:
Of course no carrot cake is finished without some cream cheese frosting. You can use your favorite recipe or try ours. Remember that the weather here is hot and humid – topics you know – so no butter is used in this recipe or it would melt off the cake.
190 grams (6½ oz) cream cheese, room temperature
3 cups powdered sugar
1 teaspoon fresh lime juice (or use lemon if you like)
Beat the cream cheese until fluffy. Slowly add the lime juice and powdered sugar. While adding the powdered sugar, keep the mixer on LOW or you will be wearing that powder! Continue to beat until it is completely smooth and the consistency you want. Sometimes it is necessary to add a bit more powdered sugar, if so, no problem, add a couple of tablespoons at a time.
You can easily double this recipe if you want more frosting.
Monday, October 7, 2013
Tongue in Tomato Sauce
Yeah, yeah, I can hear you and I can see you shaking your head... thinking 'she has really gone around the bend on this one' ! AU CONTRAIRE mis amigos....
Tongue is a big part of buffet tables in many cultures including Greek. If you have had Greek buffet, French buffet, or even Italian buffet, then you have already eaten tongue and just didn't know it. Aren't they sneaky to not tell you!
Beef tongue just tastes like, well....beef. It has a light texture and I actually prefer it in sandwiches rather than as a meat course. The flavor is mild and is well suited for many types of sauces from a basic mustard to a more extravagant cream based sauce.
I expect to hear feedback from you on how surprised you were at the wonderful flavor of this meat. So let's get started...........
Makes about 4-6 servings
Ingredients:
1 beef tongue (they are all about the same size)
3 quarts (3 liters) cold water
1 medium white onion, quartered
1 small head garlic, unpeeled, cut in half across the bulb
1 teaspoon freshly ground black pepper
3 bay leaves
1/2 teaspoon dried thyme
1/2 teaspoon dried oregano
1 teaspoon salt, (I use kosher always - it has no additives)
Toss all these ingredients into a stock pot. Bring the water to a boil; lower the heat and simmer for 2 to 2-1/2 hours or until the meat is tender. Do the fork test. Allow the tongue to cool in the broth. Remove the tongue once it is cool and peel the skin off. For goodness sakes, it just peels off. Reserve 1/4 cup of the broth, strained.
Cut the peeled tongue into thin 1/4 inch or less (not thicker) slices.
Now on to the sauce:
3 tablespoons olive oil
1 medium white onion, finely diced
1 jalapeno chile, finely chopped (remove or don't remove the seeds)
5 medium tomatoes, diced
pinch of salt - to taste
Heat the oil in a large skillet. Add the onion and saute until lightly browned. Add the chile and tomatos. Cook over low heat for 15 minutes, then add the reserved broth.
Add the tongue slices and simmer for another 10 minutes.
Remove the slices to a platter and spoon the tomato sauce over top. Garnish with either chopped parsley or cilantro. Serve with sandwich rolls.
Saturday, September 28, 2013
Stuffed Plantains
By now you all understand when I say
'plantain', right? It looks like a banana, a very large banana, but
is nothing like a banana once you take the peel off. They are also
known as platano macho in Spanish. If you have not eaten one, then
march right down to your produce store and pick up some. However,
don't start munching on them on the way home in the car! They need
to be cooked before they are palatable.
Today, I challenge you to make this
simple yet delicious main course recipe. It is sweet and savory all
at the same time....a traditional Mexican combination.
To begin you will be boiling the
peeled and sliced plantains then pureeing them, so not necessary to
have pretty slices.
4 plantains, almost ripe, peeled and
thickly sliced (see note below)
½ teaspoon salt – for boiling water
2 eggs
¼ cup flour
oil for frying
1½ cups refried beans, either homemade
or canned
1 cup sour cream
Boil enough water to cover the
plantains. When the water has come to a boil, add the salt and
plantains. Boil until they are fork tender. Remove with a slotted
spoon to a blender or food processor. Discard the boiling water.
After the plantains are pureed and have
cooled slightly, add the eggs and flour. Pulse until well mixed.
Form the dough into 24 patties thick patties. Stuff the patties with
1 Tablespoon refried beans, shaping the dough around the beans to
enclose.
Heat the oil
until it is very hot but not smoking and fry the patties, turning
once. Drain on paper towels. (remember not to crowd the pan – the
oil cools down and will only leave you with a gooey mess)
Serve 2 or 3 patties per serving.
Serve with sour cream and a side green salad.
How in the heck do I know if it
is ripe? I heard you......
The peel of the plantain will be dark
brown or almost black. Dark on a plantain is good. Yellow is NOT
ripe. The skin can also look wrinkly. (is that a word?) This is
also a good thing.
Feel it. Does it 'give' under a mild
squeeze? If so, it is ready; if not, leave it on the counter for a
few more days. Plantains are not like bananas which ripen in just a
couple of days. Plantains can take almost a month to fully ripen
from that yellowy banana color.
You can also freeze fully-ripe
plantains for later use. Peel and either place whole in a freezer
bag or slice them up. They are great with ice cream or blitzed up
into a cream as a topping for fruit or cake – like a spice cake!
Sunday, September 22, 2013
Reviews
Have you read the From the Kitchens of Pancho Villa? Write a review to help others decide.
Click on Comments to read what others are saying about From the Kitchens of Pancho Villa and don't forget to leave your own review. Thank you!
Click on Comments to read what others are saying about From the Kitchens of Pancho Villa and don't forget to leave your own review. Thank you!
Saturday, September 21, 2013
Tomatillo Dip with Ancho and Pasilla Chiles
Here is another simple recipe that will
WOW! your friends. Since I know you make most of the recipes posted
here, you already have both the ancho and pasilla chiles in your
pantry. These 2 chiles are among the most common dried chiles you
will find in your market. The other is the guajillo, but we won't be
using that one today.
After making this recipe, I have found
other ways to use this dip. I make a lot of chicken, most people
probably do. This is a wonderful sauce for grilled, sautéed or
roasted chicken; sandwiches and tacos too. You certainly don't need
to have company over to make this because it says 'dip'. Consider it
an accompaniment.
So here we go:
Makes enough dip for 4 people or 2
gordos....... (you will have to look that one up)
2 ancho chiles – stem and seeds
removed, wipe the chiles with a very slightly damp paper towel
2 pasilla chiles – do the same thing
with these
2 teaspoons oil (not extra-virgin)
½ white onion, rough chopped
2 cloves garlic
10 oz (300 grams) tomatillos, husks
removed, washed and chopped
½ teaspoon salt
½ cup sour cream
7 oz (190 grams) cream cheese, room
temperature
2 tablespoons cilantro
Heat the oil in a small skillet. Sauté
the dried chiles, onion, garlic and tomatillos until they are soft.
Pour into a blender with all the other
ingredients. Blend until it is a spreadable consistency.
As a dip, serve with tortilla chips or
crackers. As a spread, use your imagination!
Wednesday, September 18, 2013
Oaxaca Style Eggs
We have all seen the commercials about
having eggs for meals other than breakfast. This is a perfect egg
dish to serve at any meal. You can even make the sauce ahead and
keep in the refrigerator, or better yet, freeze some. I love to make
a huge batch of sauce and package in freezer bags the amount most of
my recipes call for. Once you begin to make your cooked salsas for
freezer storage, you life will be much simpler and you will find that
preparing good, authentic Mexican food is a snap! I am going to
start you out with the sauce I have here today. We will make a
double batch so you can freeze half. Remember than many sauces are
interchangeable and not just good for one recipe. This is a
wonderful sauce to poach chicken, or spoon onto grilled meat, or a
hamburger, or....... you get the picture.
4 servings
On to the sauce...
3 cups water
8 Roma tomatoes
2 white onions, divided usage = 1½
plus ½
12 whole garlic cloves, not necessary
to peel
3 serrano or jalapeño
chiles (serranos have more heat), stems removed
2
slices white onion
3
sprigs fresh epazote – (if unavailable: 3 sprigs cilantro)
salt
to taste
Put
the water in a saucepan with the tomatoes, 1½ onions, 8 garlic
cloves and the chiles. Boil over medium heat for 20 minutes. Drain,
reserving 1 cup cooking liquid. Cool slightly. Blend the cooked
ingredients with ½ onion, 4 garlic cloves and a ¼ – ½ cup of the
reserved cooking liquid in a blender. If the sauce is too thick, add
a bit more liquid.
Heat
the oil in a medium sized frying pan. Add the onion slices and
brown. Carefully pour in the liquefied sauce and stir in the epazote
and salt to taste. Cook until the sauce has thickened a bit, about
10 minutes. Keep warm. Spoon half of the sauce into a freezer
container for later use.
OK,
time for the eggs:
4
Tablespoons oil (not extra-virgin)
12
eggs
salt
to taste
8
epazote leaves (leaves only), finely chopped
In
a medium to large skillet, heat the oil until very hot. With a
whisk, beat the eggs with salt and epazote leaves. Carefully pour
the beaten eggs into the hot oil and cook until the underside is set.
Flip the eggs over in the pan – try your skills at flipping in the
air – maybe try it over a tray lined with plastic just in case...
continue cooking the eggs until they are firm. Cut the eggs into
bite size pieces and add the sauce. Cook over low heat for 20
minutes more. Add a little more cooking liquid if the sauce becomes
too dry or thick.
To
serve these delicious eggs, pour them onto a large platter. Garnish
with some extra epazote if you like. Serve with warm tortillas and
refried beans.
Sunday, September 15, 2013
Melted Cheese (Queso Fundido)
Melted Cheese
Cheese isn't a nasty word, is it? I
guess it is if you have an over-the-top cholesterol count. If you
do, then today's recipe is NOT for you, sorry. We do not have
reduced fat or fat free cheese here so I have not been able to test
one of these varieties for you. But look through the prior recipes
and most of them are cholesterol and heart friendly.
I happen to be one of those folks who
just needs to try not to eat

Queso Fundido (melted cheese) has many
faces as do so many other authentic Mexican recipes. This is another
variation and one I think you will like and make often.
With football season upon us, even you
men out there can make a great snack for your buddies. Think how
impressed they will be with your new-found culinary skills! This
ain't no sissy food!!!!
*Note: if you cannot find the exact
cheeses I recommend, you can substitute what is available to you with
these caveats
- you need a smooth melting cheese
- mild flavor white cheese (NOT white cheddar)
- some cheeses you can substitute, but not limited to (you need 3 different cheeses)
- muenster
- Monterey Jack
- mozzarella
Serves up to 8 but who's counting?
Start with the sauce (salsa). Not all
salsas are created equal and wow this one has a punch! You can take
the liberty of leaving out some – not all – of the chiles. (If
you wish, you can substitute jalapeños
for the serranos).
1
medium size white onion, finely diced
4
large tomatoes, seeds removed, then diced
2
serrano chiles, finely diced ** or substitute 2 jalapeño chiles –
remove seeds for less heat
1
cup cilantro leaves, finely chopped
½
teaspoon dried Mexican oregano
¼
cup fresh lime juice
¼
teaspoon salt *
* I know I have told you never, never
put salt in a fresh salsa, but this salsa will be marinating (sort
of) and needs to have some liquid pulled out to help blend the
flavors.
Mix
all the ingredients together in a serving bowl. Allow to sit outside
the refrigerator for at least 1 hour before serving. You may cover
it with a lid or not, your choice.
On
to the Cheese:
This
can be baked in a regular oven or counter-top oven. Preheat oven to
175° C (350° F).
Grease
(I use butter but you can also use a non-virgin olive oil) either 8
individual oven proof dishes (about ¾ cup each) or a glass baking
dish, such as deep dish pie pan.
Ingredients:
395
grams (14 oz) EACH Chihuahua, asadero, Oaxaca - grated
Notice
that I use the same amount of each cheese. Use the weight of the
cheese, not cups or volume. If you want more or less servings,
increase or decrease the amounts.
Mix
all the cheese together and divide equally among the individual
dishes or pop into the larger baking dish. Bake until the cheese is
melted and bubbly. The time should only be about 10 minutes. A
little more if you have the cheese in one dish, but keep an eye on
it. Browning a little of the top is OK, but not necessary. Use the
baking dish(es) as your serving dish. (Men: don't forget a hot pad
for the table).
Serve
immediately with the sauce and fresh, warm tortillas. Corn is
traditional but flour is acceptable.
Saturday, September 14, 2013
Fresh Fruit Salad
 Fruit salad is probably one dish that
is made in most of the homes around the world, changing the
ingredients to fit the area and season. Here in Mazatlán
we all have our favorite fruits and our own ways of combining them.
Who doesn't start salivating at the thought of fresh strawberries,
sweet pineapple, and crisp apples all drizzled with a honey lime
sauce?
Fruit salad is probably one dish that
is made in most of the homes around the world, changing the
ingredients to fit the area and season. Here in Mazatlán
we all have our favorite fruits and our own ways of combining them.
Who doesn't start salivating at the thought of fresh strawberries,
sweet pineapple, and crisp apples all drizzled with a honey lime
sauce?
My
Mexican friends all make their own variety and I enjoy each one.
Well, most of them anyway, I just don't
like grapes and that seems to be a common ingredient in many of them.
I spoon up the fruit around the grapes so I don't have to explain
why they are still sitting on my plate.
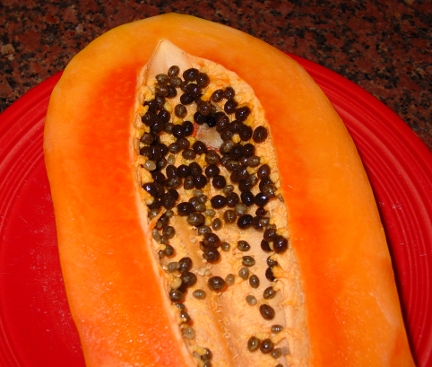
Other
common fruits that are used here most often are papaya, mango,
watermelon, kiwi and maybe a banana. I like to use all of these
fruits. The color is inviting and the blend of flavors will
tantalize your taste buds. (some of these fruits are considered
aphrodisiacs so ...). The quantity of each fruit depends on your
particular tastes. I love more papaya and mango in my salad, with
lots of pineapple.
Don't
forget to keep the seeds from your papaya. They are edible and have
a nice peppery flavor.
To
the salad:
All
the fruit should be fresh and cut into bite-sized pieces. I like a
combination of ½ inch dice, thin slices and wedges.
Papaya
– cut into cubes (reserve the seeds but don't rinse them)
mango
– peeled and cut into cubes
pineapple,
cored and cut into small wedges
watermelon
– cut into cubes, seeds removed or purchase a seedless variety
fresh
strawberries – hulled and sliced down through the entire berry
kiwi
– peeled and sliced into rounds
honey
(optional and may be omitted)
fresh
lime juice
 Place
all the fruit into a large clear glass bowl. Mix some honey with
fresh lime juice to your taste. The amount you need will depend on
the size of your salad. OR if you have opted to omit the honey,
squeeze fresh lime juice over the fruit. Toss gently to coat and mix
the fruit. Sprinkle the top with the reserved papaya seeds.
Place
all the fruit into a large clear glass bowl. Mix some honey with
fresh lime juice to your taste. The amount you need will depend on
the size of your salad. OR if you have opted to omit the honey,
squeeze fresh lime juice over the fruit. Toss gently to coat and mix
the fruit. Sprinkle the top with the reserved papaya seeds.
Making
fruit salad should be easy and always fresh. Never use canned or
frozen fruit. If you have other fruit in your refrigerator, use it.
If adding a banana, include it at the last minute before serving,
drizzle the slices with a bit more lime juice to keep from browning.
Have
this for dessert too. Omit the papaya seeds and drizzle some
sweetened sour cream over the top for a sweet and tangy sauce.
Monday, September 9, 2013
Refried Beans
Here is an excerpt (between the ****) from the book From the Kitchens of Pancho Villa that explains everything you need to know about refried beans, the authentic Mexican way!
****
The first thing I do with dried beans of any kind is sort them on a white plate, so that I can easily see the tiny stones or shriveled beans at a glance. Discard anything that looks foreign or discolored.
To soak or not to soak—in Mexico, it is not necessary to soak beans because they are not old beans. In other parts of the world, the turnover in dried bean supplies may not be as active, so if the beans are old, soaking is the way to go. If you choose to soak, then you will need to plan ahead, as they will need to soak overnight. Rinse the beans in a colander and then put them in a large pot. Cover them with cold water to about 7.62 cm/3 inches above the beans. Let sit until tomorrow. In the morning, drain and rinse again. They are now ready to be cooked.
Or ...
Rinse the beans in a colander and then put them in a large pot with a well-fitting lid. Cover them with cold water to about 7.62 cm/3 inches above the beans. Heat the beans over medium heat until they have come to a rolling boil. Keep the lid on—no peeking. Turn the heat off, and let them sit undisturbed for one hour. After one hour, drain the beans and rinse again. They are now ready to be cooked. Now, what you have been waiting for ... (drum roll) ...
Refried Beans ... THE RECIPE
Frijoles Refritos
2½ cups dried beans
1 clove garlic, roughly chopped
½ onion, roughly chopped
2 teaspoons salt
1 Tablespoon dried epazote (optional)
3 Tablespoons real pork lard (fresh, if possible; not that white canned stuff) or oil (both are commonly used)
After you have either soaked the beans overnight or hydrated them by cooking for an hour, you are now ready to really cook them.
In your pot, put the newly rinsed beans, the onion, and garlic and add enough water to cover by 5 cm/2 inches. You will salt them a bit later.
Over medium heat, cook the beans 1 hour. Add the salt and epazote. Cook for another hour. Test for doneness at this point. Taste one to see if it is totally soft. If it is, they are done. If it still has a bit of chew to it, keep cooking. Check them at 30 minute intervals.
NOTE: The times may differ, depending on the age of the dried beans. The older the bean, the longer the cooking time.
When the beans are done, drain them, reserving about 1 cup of the cooking broth. Now is the time to mash the beans, onion, and garlic. The way to mash them offers another choice: you can mash them with a potato masher and have some lovely little chunks of beans mixed with the bean purée, or you can use the back of a large wooden spoon to mash them for a smoother texture. I like them really smooth, so I use an immersion blender. If your beans are too stiff, add some of the broth you kept—not all of it, just a little at a time to thin them out.
When you have the consistency you like, heat the lard or oil in a large frying pan. When it is hot, add the beans and let them fry, stirring occasionally until they are heated thoroughly and all the lard/oil has been absorbed. Adjust your salt, if necessary. Serve.
****
Tacos al pastor
page 117 From the Kitchens of Pancho Villa (recipe only)
Ingredients
2 kilos (4.4 pounds) boneless pork leg, sliced very thin (less than 6 mm / 1⁄4 inch)
6 ancho chiles
1⁄2 head garlic, peeled
3 teaspoons salt
1 large can sliced pineapple (1.7 pounds/820 grams)
1⁄3 large onion
oil (small amount for searing the meat)
warm corn tortillas (lots of them)
In a small pan of boiling water, add the ancho chiles. When they are soft, about 5–10 minutes, remove them from the water. When they are cool enough to handle, remove the stems, seeds, and veins. Place the cleaned chiles in a blender jar with the garlic, 3 teaspoons salt, onion, juice from the canned pineapple, and enough water to cover the chiles. Blend until very smooth. Pour into a wide pan or dish.
In a hot skillet or grill pan, drizzle 1 tablespoon oil. Heat until it is very hot. Dip the meat slices into the ancho sauce, then carefully place them in the hot pan. Since the meat is very thin, it will cook in about 3–4 minutes on each side (depending on the thickness you have). When the meat is done, remove it to a
plate. Scrape the scraps from the pan after each piece of meat is cooked and discard so you don’t have any burned sauce on the next piece. Add more oil, 1 tablespoon at a time, as needed, and repeat the cooking process with as much of the meat as you wish to cook.
Dip the pineapple slices into the sauce, and sear them on both sides.
Chop the meat into bite-sized pieces and put on a large plate. Chop the pineapple into chunks, and place alongside the meat on the plate. Each person can make his or her own tacos from this serving plate.
Spoon the meat and pineapple into warm tortillas.
Subscribe to:
Posts (Atom)
As seen on:
